3. Attribute Directives - ngStyle
3.A. Apply multiple CSS properties to a paragraph in a component using ngStyle.
Add the following code to component.ts
export class YourComponent {
paragraphColor: string = 'red';
paragraphFontSize: string = '20px';
}
In your component.html file, use the ngStyle directive to apply the styles:
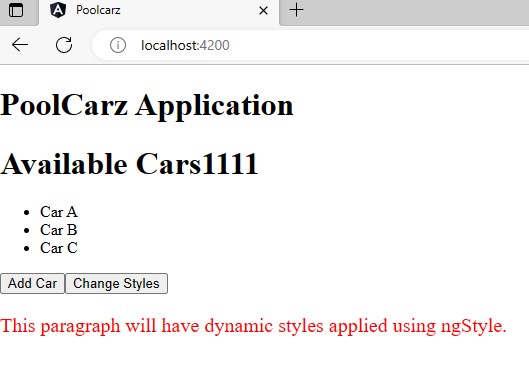
<p [ngStyle]="{ 'color': paragraphColor, 'font-size': paragraphFontSize }">
This paragraph will have dynamic styles applied using ngStyle.
</p>
- Whenever the component's properties
paragraphColororparagraphFontSizechange, the paragraph's style will be automatically updated accordingly.
For instance, if you want to change the styles dynamically based on a button click, you can do it in the component's logic:
export class YourComponent { paragraphColor: string = 'red'; paragraphFontSize: string = '20px'; changeStyles() { this.paragraphColor = 'blue'; this.paragraphFontSize = '24px'; } }
In the component.html file, you could have a button to trigger the style change:
<button (click)="changeStyles()">Change Styles</button>
<p [ngStyle]="{ 'color': paragraphColor, 'font-size': paragraphFontSize }">
This paragraph will have dynamic styles applied using ngStyle.
</p>
In Angular, you can apply multiple CSS classes to an element using the ngClass directive. The ngClass directive allows you to conditionally add or remove classes based on certain expressions. To apply multiple classes, you can pass an object or an array of classes to the ngClass directive.
Here's an example of how to use ngClass to apply multiple CSS classes to an element:
Suppose you have the following component in your Angular application:
app.component.ts
import { Component } from '@angular/core'; @Component({ selector: 'app-root', templateUrl: './app.component.html', styleUrls: ['./app.component.css'] }) export class AppComponent { applyRedClass = true; applyBoldClass = false; applyUnderlineClass = true; }
In this example, we have three CSS classes defined: .red-text, .bold-text, and .underline-text. The ngClass directive is used on the <div> element. It applies the classes based on the boolean values of the applyRedClass, applyBoldClass, and applyUnderlineClass properties from the component. If a property is true, the corresponding class will be applied to the element.
In this case, the resulting HTML will be:
<div class="red-text underline-text"> Sample Text </div>
red-text and underline-text classes are applied to the element because their respective boolean values are true, while the bold-text class is not applied as its boolean value is false.To create a custom attribute directive in Angular that displays a given message in a paragraph and changes the text color to red when the user clicks on it, follow the steps below:
Step 1: Generate the custom directive using Angular CLI. In your Angular project, open the terminal and run the following command:
ng generate directive showMessage
This will generate a new directive file named show-message.directive.ts in the src/app folder.
Step 2: Implement the custom directive logic.
Open the show-message.directive.ts file and update its content as follows:
import { Directive, ElementRef, HostListener, Renderer2 } from '@angular/core'; @Directive({ selector: '[showMessage]' }) export class ShowMessageDirective { constructor(private elementRef: ElementRef, private renderer: Renderer2) {} @HostListener('click') onClick() { const message = 'This is the custom message to display.'; this.renderer.setProperty(this.elementRef.nativeElement, 'innerText', message); this.renderer.setStyle(this.elementRef.nativeElement, 'color', 'red'); } }
Step 3: Using the custom directive. Now that the custom directive is ready, you can use it on any element in your components. For example, let's say you want to use it on a paragraph element:
app.component.html
<p showMessage>Click me to display the message in red!</p>
showMessage directive is applied to the <p> element. When the user clicks on the paragraph, the onClick() method in the custom directive will be triggered. It will set the inner text of the paragraph to the custom message defined in the message variable and change the text color to red.
Comments
Post a Comment